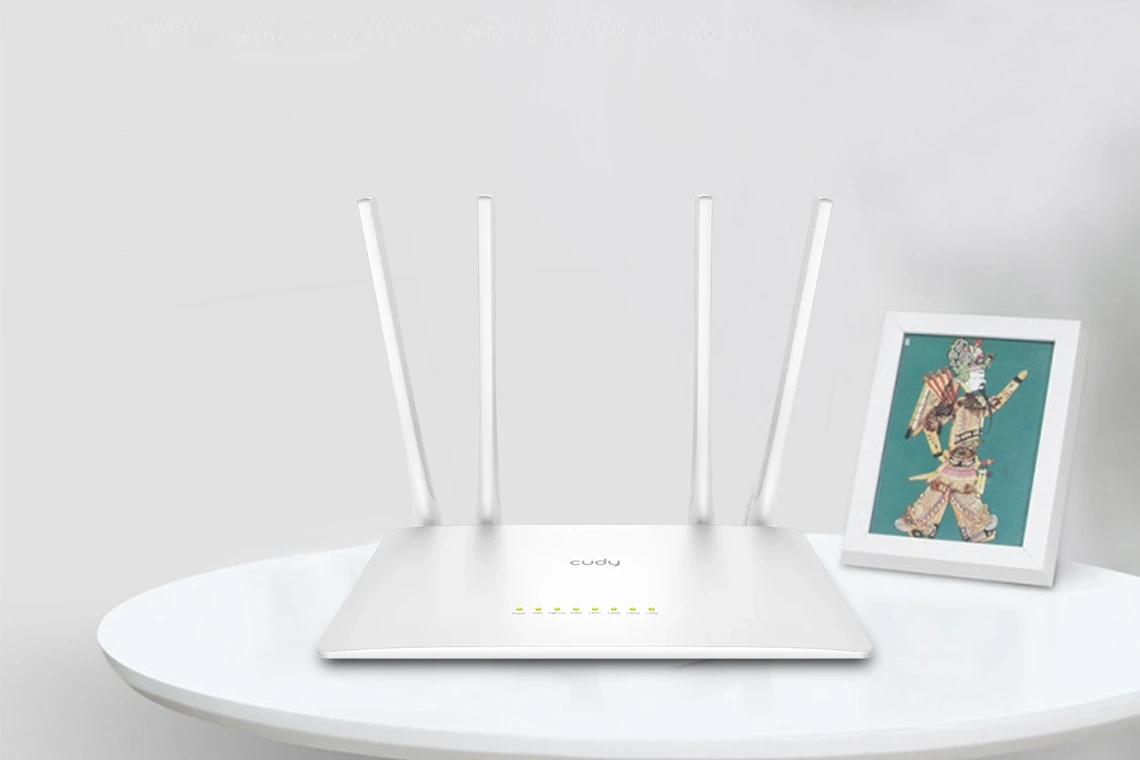
Cudy AC1200 Router Setup
In this modern world, the networking world is flooded with a wide array of networking devices. In a similar vein, Cudy provides promising wifi connectivity solutions to its users via its cutting-edge wifi routers and range extenders. Additionally, there are several models for each networking gateway, laced up with incredible networking functionalities. Similarly, it has the AC1200 routers, to access which, you need to perform the Cudy AC1200 router setup first.
However, if you have a newly owned Cudy AC1200 router and want to explore its full potential, then this guide is for you. Herein, you will find relevant details regarding the Cudy AC1200 setup procedure. In addition, this post helps you to uncover the best ways to complete this process. So, read this guide thoroughly for more insights!
Essentials For the Cudy AC1200 Router Setup
To begin with the Cudy AC1200 configuration you would require several things. So, here are some of them:

Cudy AC1200 Router

Strong internet connection

Accurate web /IP address

Valid admin details

Cudy app

Smartphone /computer

Ethernet cables, etc.
How to Perform the Cudy AC1200 Setup Effortlessly?
Generally, there are two ways to perform the Cudy AC1200 router setup, i.e., via web browser and using the Cudy app. However, the user-friendly interface of the Cudy AC1200 router, lets the users seamlessly perform this process. So, this section outlines the stepwise procedures for each method:
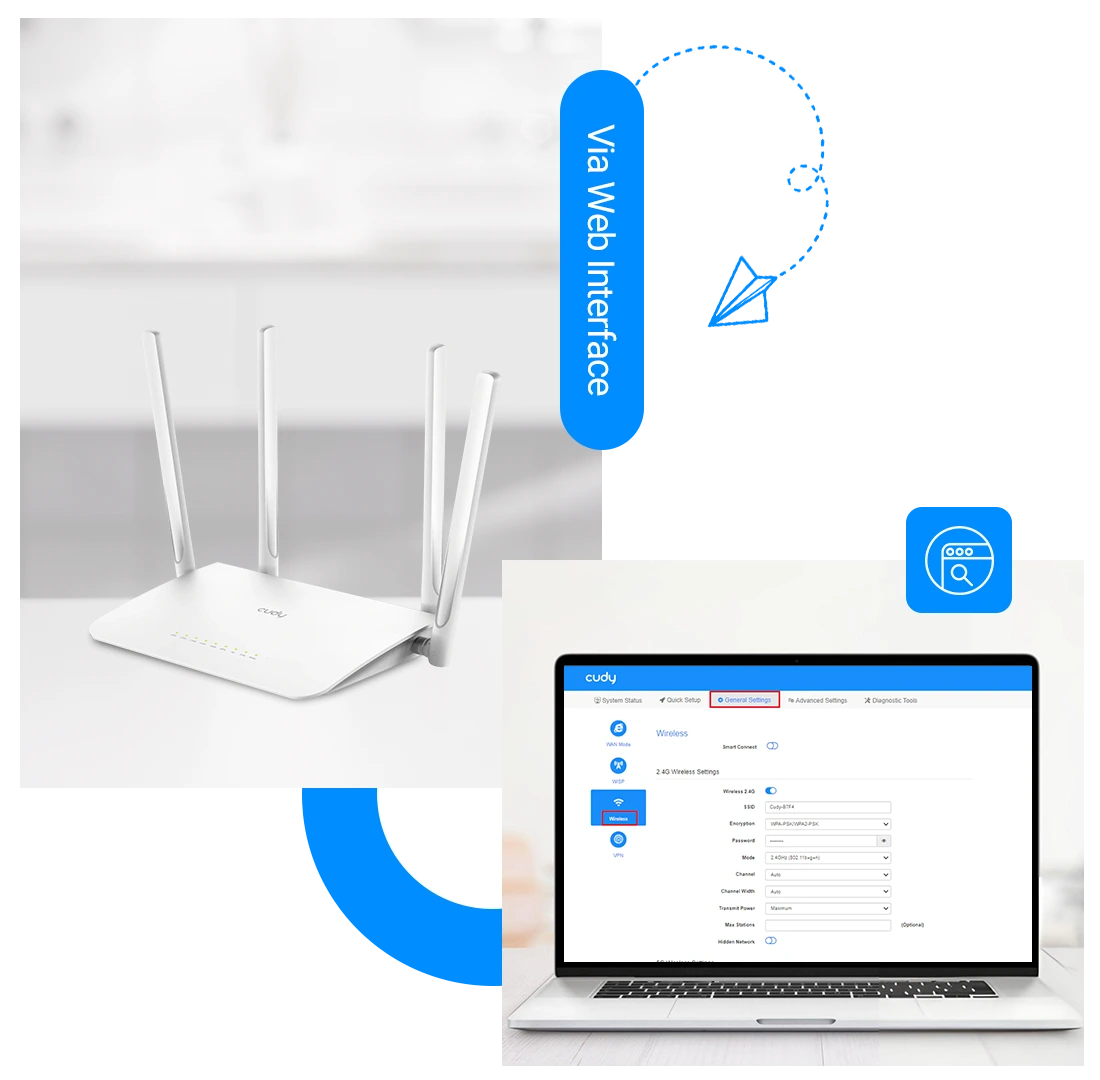
Setting Up Cudy AC1200 Via Web Interface
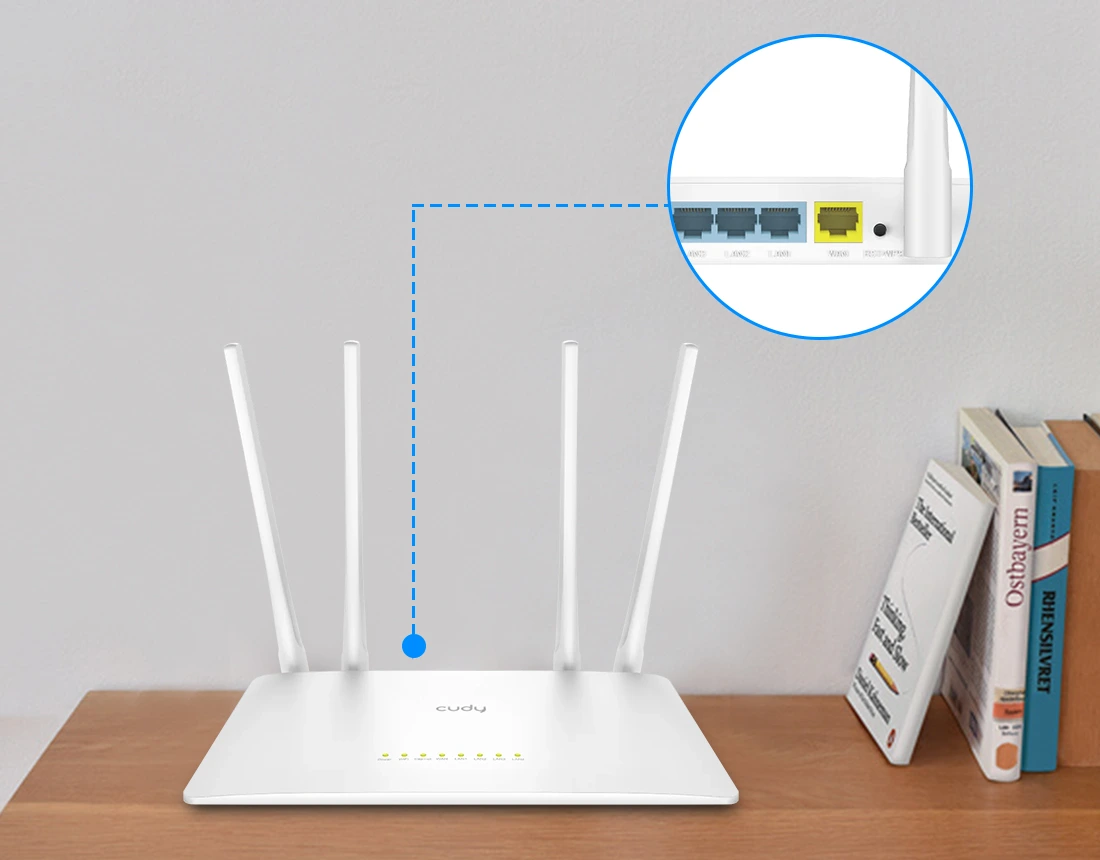
- Initially, connect one end of the Cudy router to the modem’s LAN port and the other to a power socket.
- Then, turn on your networking device and wait for it to restart.
- Now, power on the Cudy router’s main mesh unit.
- After that, connect your computer to a stable internet connection.
- Further, open a web browser and type the cudy.net web address or 192.168.10.1 IP address in the browser bar.
- Then, access the admin panel using valid admin details.
- Hereon, you reach the smart home dashboard of the Cudy router.
- Next, select the ‘Wireless Router’ mode from the quick setup wizard and hit ‘Next’.
- Further, select the ‘Time Zone’> Next>select Connection Type>Next.
- Now, tap on ‘Save & Apply’.
- After that, navigate to the Wireless>General Settings>2.4 GHz Wireless Settings.
- Hereon, edit your default SSID and password and tap on ‘Save & Apply’.
- Similarly, configure the Advanced Settings as per your preferences.
- You can set up the Guest Network, Port Forward, Network, Security, and other settings accordingly.
- At last, save and apply all the modified settings to end this procedure.
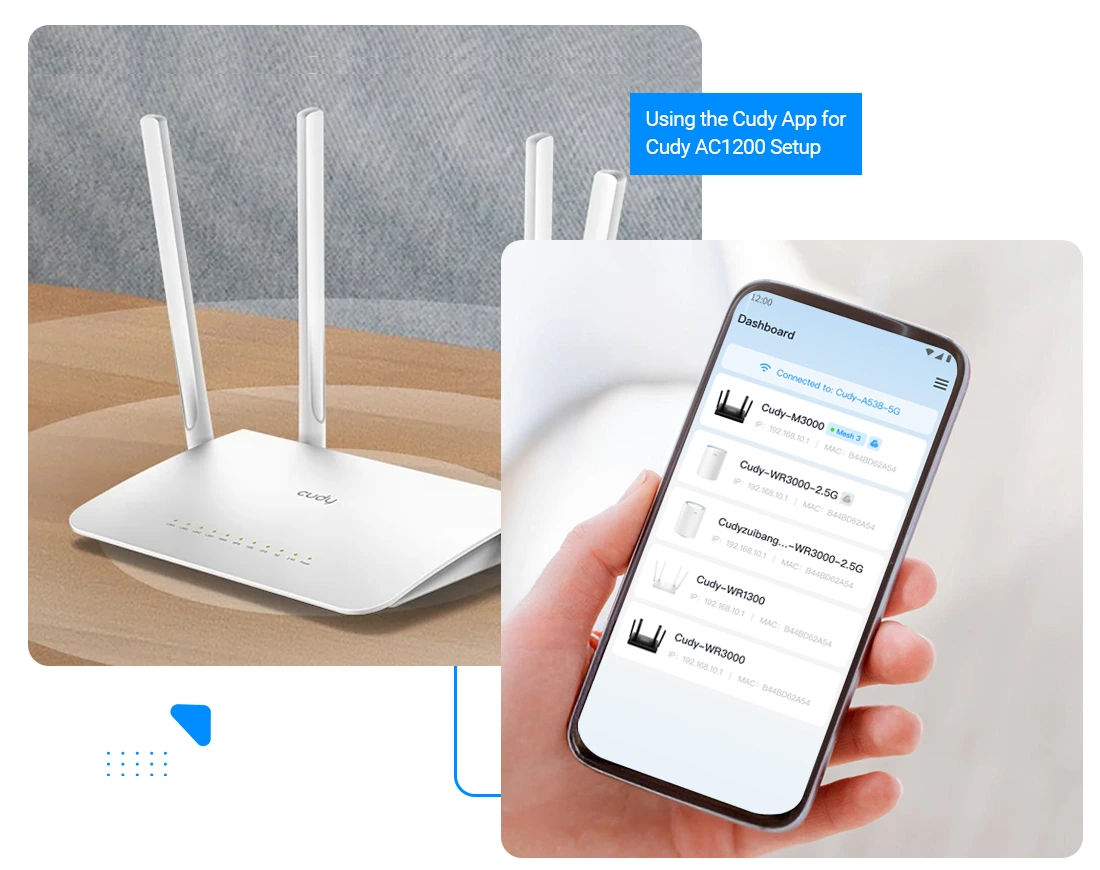
Using the Cudy App for Cudy AC1200 Setup
- Firstly, make sure your Cudy router has sufficient power supply.
- Then, connect your smartphone to the existing home network.
- Now, update the Cudy app from the AppStore or PlayStore.
- Further, launch the app and log in using valid admin details.
- You reach the smart home dashboard of the router.
- Hereon, go to Settings to add a new device by tapping on the “+” icon.
- Further, navigate to the WiFi section appearing on the bottom bar.
- To edit the default SSID and password, update the corresponding fields with the new network name and password.
- Additionally, secure your network with the WPA2-PSK encryption type.
- After that, tap on ‘Done’ to save and apply these changes.
- Similarly, navigate to the WPS, Firmware, etc. sections to configure other settings.
- Finally, you are done with the Cudy AC1200 router setup process.
How to Perform the Cudy AC1200 Router Firmware Update?
A firmware update is essential to ensure the optimal functioning of your networking device. Additionally, it helps in fixing the technical glitches and connectivity issues. However, you can easily accomplish this process via the web interface of the Cudy AC1200 router. So, find the details steps for this procedure:
- Initially, download the latest firmware file from the website and save it on the local storage.
- Now, power on your networking device and allow it to boot up.
- Then, confirm that your computer is connected to a stable network.
- After that, log into your Cudy AC1200 router’s admin pane via cudy.com web GUI.
- Then, access the router’s setup wizard.
- Further, navigate to the Advanced Settings and then select the Firmware option.
- Hereon, choose the firmware file you saved previously on your device.
- Upload this file and wait for 5 minutes to complete this process.
- Finally, the Cudy AC1200 Router Firmware Update is accomplished.
What is the Simplest Way to Reset Cudy AC1200 Router?
However, a factory reset erases all the customized settings from your networking device. Additionally, it brings the device to its factory default settings. After performing a factory reset you need to reconfigure your device from scratch. Amongst the available methods of AC1200 reset, the reset button method is the simplest of all. So, here are the detailed steps for the same:
- Primarily, make sure your networking device is powered on.
- Then, find the reset button on the Cudy AC1200 router.
- Further, press and hold this button for 30 seconds.
- Release this button, when you see an LED blinking on the router.
- Finally, your router comes back to its default settings.
- With this, the reset Cudy AC1200 router finishes.
All in all, this comprehensive dived deep into the Cudy AC1200 Router Setup process. If you want to know more about this device, get in touch with us!
Frequently Asked Questions
Can I Access My Cudy AC1200 Router on the Access Point?
Yes, you can access the Cudy AC1200 router as an access point.
Do I Need a Computer to Configure My Cudy Router?
Yes, you need a computer or laptop to configure the Cudy router. But, if you don’t want to access its web interface, then you can opt for the smartphone app.
How to Power Cycle the Cudy AC1200 Mesh Router?
To power cycle or cold restart your Cudy router, unplug it from the power supply, wait for 30 seconds, and plug back it into the power supply.
Why Can’t I Access the Settings Page of the Cudy AC1200 Router?
If you are facing issues in accessing the settings page of the Cudy router, then check that it is connected to a stable internet connection. Additionally, check the web address and IP address to access the Cudy router. Also, verify your admin details from the user manual or product label.